


|
Debit & Credit Notes
Debit notes increase the balance of the Debtors and Credit notes decreases the balance. These transactions are often used to make adjustments or to rectify wrong entries. Both Debit & credit notes are posted from the Transaction Entry Screen.
1. Click the Add button in the inquiry screen. The following screen will be loaded.

2. Choose the option of Credit Note /Debit Note as the case may be.
3. Enter the AR Account to whom the CN/DN is being raised.
4. The print option is ticked by default, so that the system prints the CN/DN automatically on saving the record to the database.
5. The transaction type displayed will be CN for credit note and DN for debit note, as defined in the AR Control screen.
6. The date, i.e. the transaction date is displayed as the current business date by default. The date can be any other date prior to the business date for recording the transaction.
7. The number is the transaction number which will be generated by the system automatically on saving the record into the database.
8. The currency will be displayed by the system, if there is any foreign currency defined for the AR account in the Create/Modify AR account screen.
9. Enter the amount for which the CN/DN is being generated.
10. Type in any Note/Particulars for the transaction.
11. To attach any extra document to the payment transaction, click on the link.
12. In the lower half of the screen, enter the appropriate GL account code that will be debited in case of Credit note and vice versa.
13. In case there are more GL accounts that are affected because of the transaction, the same can be entered by clicking the Add Row button at the bottom of the screen.
14. Click the Save & Close button to store the transaction into the database and exit from the screen, or Save & new to continue recording more transactions.
 15. The system
will prompt to settle the credit note after it is saved to the database.
User can choose settle now by clicking the ‘yes’
button or later by accessing the settle
documents screen from the main menu.
15. The system
will prompt to settle the credit note after it is saved to the database.
User can choose settle now by clicking the ‘yes’
button or later by accessing the settle
documents screen from the main menu.
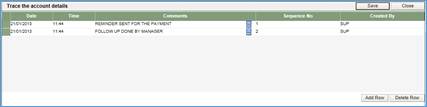
16. The following screen will be loaded on clicking yes.

17.
The details of the selected CN transaction to be settled is displayed
on the top right of the screen.
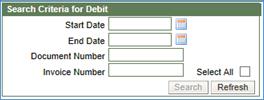 18. The user may
or may not enter a search filter to list the debit records for settlement.
18. The user may
or may not enter a search filter to list the debit records for settlement.
19. Click the Search button to list the qualifying debit records.
1. 20. The information displayed for each record in the grid are:
|
S. No |
Column Name |
Description |
|
1 |
Date |
The transaction date. |
|
2. |
Type |
The transaction type of the debit record. |
|
3. |
Document Number |
The transaction number of the record. |
|
4. |
Bill Number |
The invoice/bill number (if generated) of the front office debit transactions. |
|
5. |
Forex Amount |
The amount in foreign currency. |
|
6. |
Amount |
The transaction amount. |
|
7. |
Settle |
This is a checkbox to select the record for settlement. To settle a transaction against the selected credit note or payment, tick the checkbox of the appropriate record. |
|
8. |
How much in Forex |
If the settlement is in foreign currency, then type in the amount that is to be settled. |
|
9. |
How much |
The amount that needs to be settled against the selected CN/PM. |
|
10. |
Particulars |
The particulars of the transaction. |
After ticking the settlement check box in column 7 and entering the amount to be settled in column 9 click the Save & close button on top of the screen to complete the process of settlement.

