


|
Invoice
At times the hotel needs to raise invoices to customers other than the guests staying in the hotel, e.g. hotel rents out spaces to shops. Invoices for all such transactions are generated using the option of Invoice in the Transaction Entry Screen.
1. Click the Add button in the inquiry screen. The following screen will be loaded.

2. Choose the option of Invoice.
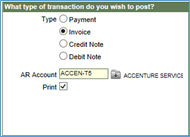
3. Enter the AR Account to whom the invoice is being raised.
4. The print option is ticked by default, so that the system prints the Invoice automatically on saving the record to the database.
5. The transaction type displayed will be IN, as defined in the AR Control screen for payment received transactions.
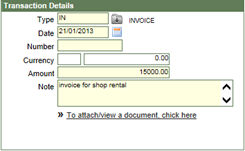
6. The date, i.e. the transaction date is displayed as the current business date by default. The date can be any other date prior to the business date for recording the invoice.
7. The number is the transaction number which will be generated by the system automatically on saving the record into the database.
8. The currency will be displayed by the system, if there is any foreign currency defined for the AR account in the 9. Create/Modify AR account screen.
10. Enter the amount for which the Invoice is being generated.
11. Type in any Note/Particulars for the transaction.
12. To attach any extra document to the payment transaction, click on the link.
13. In the lower half of the screen, enter the Revenue GL account code that will be affected because of the transaction.
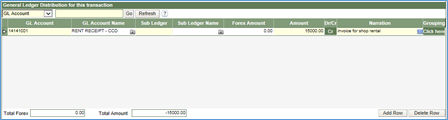
14. In case there are more GL accounts that are affected because of the transaction, the same can be entered by clicking the Add Row button at the bottom of the screen.
15. Click the Save & Close button to store the transaction into the database and exit from the screen, or Save & new to continue recording more transactions.
16. The Invoice is printed automatically on saving the record to the database.

Raising Invoices when GST is applied
The transaction entry screen in this case, will look a little different. It will look like:
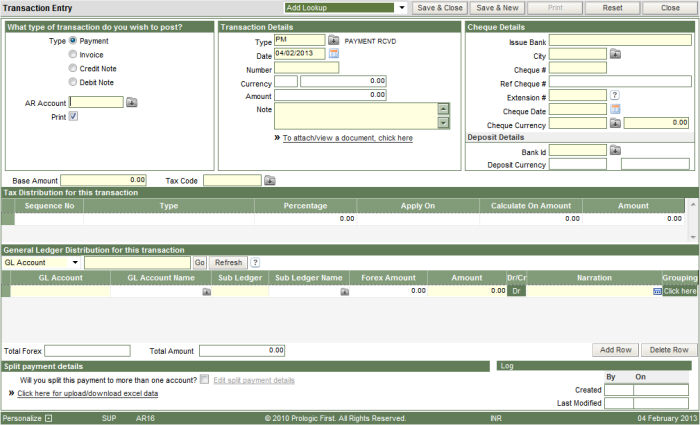
1. Choose the option of Invoice.
2. Enter the AR Account to whom the invoice is being raised.
3. The print option is ticked by default, so that the system prints the Invoice automatically on saving the record to the database.
4. The transaction type displayed will be IN, as defined in the AR Control screen for payment received transactions.
6. The date, i.e. the transaction date is displayed as the current business date by default. The date can be any other date prior to the business date for recording the invoice.
7. The number is the transaction number which will be generated by the system automatically on saving the record into the database.
8. The currency will be displayed by the system, if there is any foreign currency defined for the AR account in the 9. Create/Modify AR account screen.
10. Type in any Note/Particulars for the transaction.
11. To attach any extra document to the payment transaction, click on the link.
12. Type in the amount and select the tax code from the drop down list. The Tax codes have been setup in the AR Parameters Screen in the section Tax Master. On entering the Tax code, the taxes as defined in the Tax master will be displayed with the tax amount calculated, in the section - Tax distribution for this transaction.

13. In the lower half of the screen, enter the Revenue GL account code that will be affected because of the transaction. The GL distribution will automatically display the Tax GL account code, when the Tax code is selected in the previous step.
14. In case there are more GL accounts that are affected because of the transaction, the same can be entered by clicking the Add Row button at the bottom of the screen.
15. Click the Save & Close button to store the transaction into the database and exit from the screen, or Save & new to continue recording more transactions.
To print additional details in the Invoice:
Additional details for an Invoice that cannot be entered using the available fields of the screen, can now be done using the concept of Grouping Code.
** THIS FEATURE WORKS ONLY FOR NON- INDIAN SITES.
-
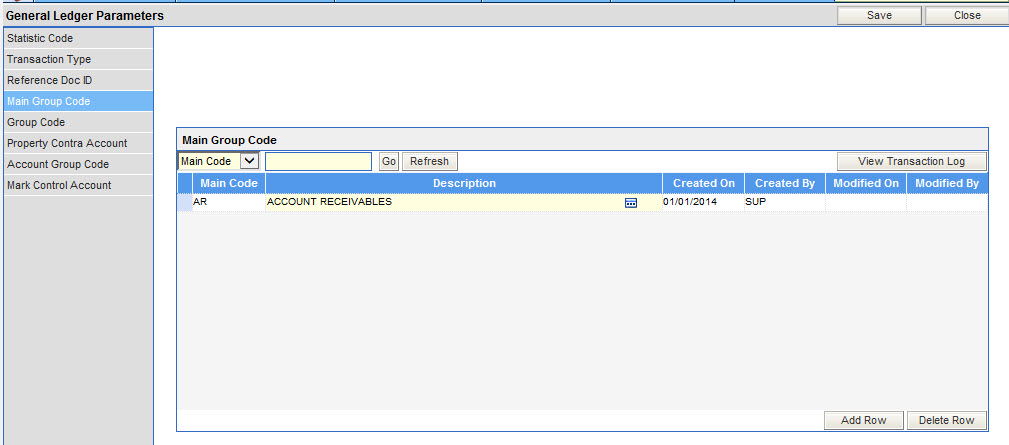
Define the Main group Code in the General Ledger Module, Main Group Code section of the General Ledger Parameters Screen. ** In a chain setup, this step has to be done by logging in as a chain user.
-
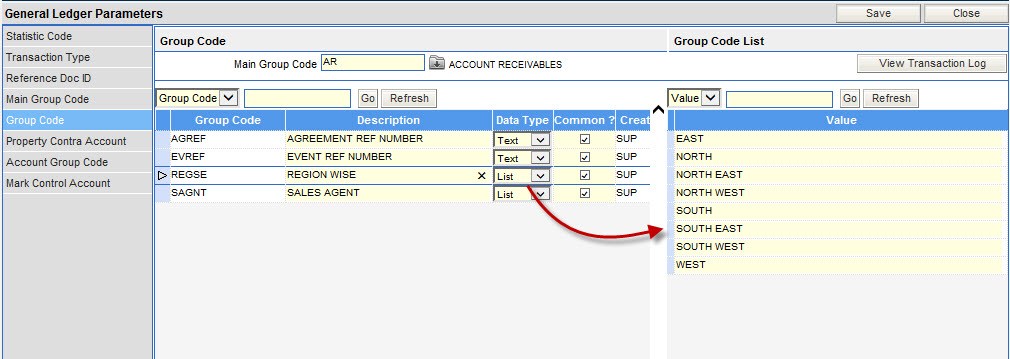
Define the Group Code, in the Group Code section, for the Main Group Code defined in Step 1. ** In a chain setup, this step has to be done by logging in as a chain user.
-
if the data type of the group code is defined as List, the values to be displayed in the List should be defined on the right half of the screen
-
In the Advance Control Screen, define the Main Group Code as the character value of the control code - ARGRPC - AR Default Grouping Code.
-
In Receivables, while posting an Invoice in the Transaction Entry Screen, the valid values (related to the Invoice) for each of the grouping codes can be entered. The Invoice Print will display the details of the grouping code entered.


